Wildlife Photo Colour Grading

Making that unforgettable impact with your wildlife photography goes beyond simply taking that picture perfect shot. These days, a lot of the magic is happening behind the scenes, with more and more photographers, especially those who are looking to turn their photos into printed artworks, turning their attention to editing.

While there are countless tools as well as countless methods that you can use to add a memorable pop to your photos, to make them stand out and truly unique, if you want to simplify your approach to editing, then you should start with learning more about colour grading.

Nature’s colours are perfect. But your camera, and its settings, don’t always quite capture exactly what it is that your eyes are seeing. Colour grading is just one method that you can use to rectify the colours and give you a better representation of the actual colours. You can also use colour grading to add that artistic touch to your images.

One word of advice before you jump in with this technique is that editing should be carefully used and only in a way that keeps the image as natural looking as possible. If you were to go over the top with your approach, you can quickly ruin a photo by making it look unreal (and not in a good way!).
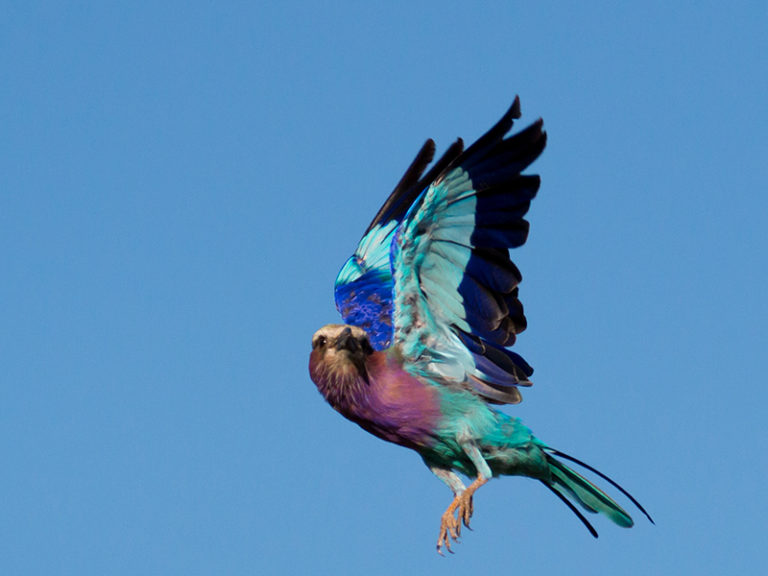
safari photography

Getting the right colour

Achieving the right colour in your wildlife photo should be your main goal. And your approach can start long before you hit the editing room. To give yourself the best possible starting point for the colour of your photo, you should pay close attention to the lighting.

As you probably already know, the lighting in your photo is going to play the biggest role in how your image comes out. Most photographers will opt for the early morning light, which can be a little blue before the sun comes out, or they will take photos in the late afternoon, when the light is more golden.

It can be difficult to naturally correct your lighting after the fact, and the lighting can dramatically change the colour in the image.

Colour Grading

First of all, what is colour grading?

In a nutshell, colour grading has to do with processing your photos in such a way that you either completely change the colour or you enhance it.

Post processing programmes like Lightroom allow you to individually alter and enhance the different colours in your image and they also give you the ability to alter the colours of your highlights and your shadows.

Through the process of colour grading, you will be creating a certain mood in your images. When it comes to wildlife photography, you will notice many go for that golden effect, to create a warm, laidback atmosphere. Often the colours in the image will also be understated, especially the greens. This is common with African safari photos where the photographer is trying to convey that dry and dusty environment. Safaris are not synonymous with vibrant greens, so getting that warm, dry look is often the goal for those trying to emulate the safari images they have seen in the past.

Ready to try your hand at African safari and wildlife photography? Then book your next safari with us and we’ll teach you the ins and outs of wildlife photography.


Ready to Experience the Wild?

Join Wild Photo Africa on an unforgettable photographic safari in the Kruger National Park.
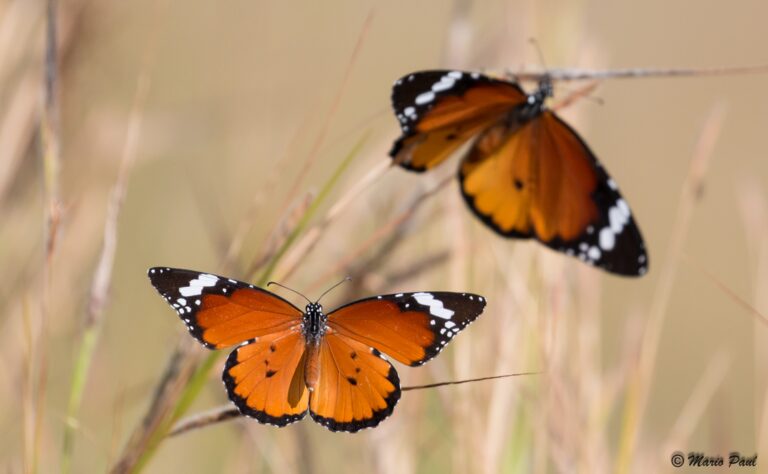
An Intro to Wildlife Macro Photography

Wildlife photography takes on many different forms. The most common type is that epic scene; a lion sitting on a rock during a thrilling lightening storm, a silhouette of elephants walking in a single line at sunset, or of hungry cheetahs chasing down their meal.

Such incredible photos dominate wildlife magazines and photograph competitions. They are what has come to be expected of wildlife shots, especially those coming out of Africa, but if you don’t want to look the same as everyone else when it comes to your personal photography style or if you’ve grown tired of those sorts of images, there is another option that you can experiment with, and that is macro photography.

Getting really up close to your subject is probably not the first thing that you think of when you think about wildlife photography, and that is because most wildlife scenes require you to be quite far away from your subject. When in the bush, animals are almost always going to be seen at a distance, and this is a good thing because it allows you to have enough space to compose a beautiful image.

With macro photography, you are experiencing the exact opposite. You will generally be so close to your subject that composition won’t actually be necessary, at least not so far as the background is concerned.

Kruger Park Safaris

Ready to Experience the Wild?

Join Wild Photo Africa on an unforgettable photographic safari in the Kruger National Park.

Wildlife Photography – What Makes a Great Shot?

When it comes to photography of any kind, there are many elements that are considered by the experts to be necessary in order to call any photo a great shot. The lighting has to be right, the subject has to be well composed and some will say there needs to be a good amount of bokeh while others will disagree and say that having some sort of background is the ultimate goal.

And even if you get every aspect of it just right, you will end up having some people still unimpressed, because that is the thing about photography; greatness is a matter of perspective.

There was once a time when photography was a serious skill that would take years to hone. Because just a few short years ago most photographers, the pros and amateurs alike, would shoot on film. This meant you wouldn’t know if you had managed to get the perfect shot until after the film had been processed.

These days we have the luxury of digital cameras and all of the advancements that have come with them, which makes them quite perfect for practicing as well as for helping to fine-tune the various elements that make a good photo because you will actually be able to preview what the image will look like before you take the shot.

Kruger Park Safaris

As for the elements, here is what you should think about the next time you do wildlife photography, if your goal is a great shot:

  1. The Rule of Thirds

You will hear this term a lot when learning photography because it is a common principle which is used to compose a memorable image. With the rule of thirds your goal is to not have the subject in the centre of your image, but instead you are going to place the subject to one side or the other, usually in a top or bottom corner. The best way to line up your subject using the rule of thirds is to make use of the camera grid.

  1. Make the most of the lighting

Lighting can absolutely set the mood for the entire photo. And it can also be that one element that turns a photo from good to great. Lighting in the wild is pretty magical just as it is, but you need to know when the light is good and how to set your exposure just right so that you take full advantage of it. And forget about the golden hour, with wildlife photography the blue hour is going to make your image a lot more impressive.

  1. Perspective matters

Anyone can see something amazing in the bush and click the shutter. But not everyone has the ability to see a story in the bush and capture the image in such a way that it conveys something special. This is a skill, one that takes a lot of practice to perfect but once you get the hang of it you will never look at photography the same way again, and you will also see that your photos begin to show more than just the subject.

If you’d like to enjoy a wildlife photography safari in the company of a professional, we have a variety of options you can consider. For more information, you can have a look at our website or contact us.


Ready to Experience the Wild?

Join Wild Photo Africa on an unforgettable photographic safari in the Kruger National Park.
What is White Balance and why is it important for Nature Photography?

Photography is all about the light. You get good light, usually the early morning or late afternoon, and then you get the light that is not so great for shooting, which is usually your very harsh midday light.

The thing about lighting when it comes to nature photography is that you don’t always get to choose when that perfect shot will come along because nature is just so unpredictable. To get a perfectly balanced shot, you need to understand light and how it interacts with your camera.

When we talk about white balance, we are not just talking about the quality of the light you have available to you, but also the colour of the light. The amount of light and the colour of the light is guaranteed to have an effect on the final outcome of your photo because it will affect the overall mood that you end up creating with your images.

If you are not all that experienced with your photography, you might snap a shot and then when you upload it to your computer, you might wonder why the colour doesn’t look right. The image could look too orange or too blue, and this is something that is not necessarily easily edited without changing other elements of the image.

For this reason, you need to learn about white balance, and how you can work with white balance to get the right look.

What is white balance?

All cameras have a built in white balance function, even the cheapest of point and shoot cameras have them. With the white balance function, you are able to choose the right option for the scene and the lighting you are working with, and the camera will even out the hues, ensuring that you don’t end up with an image that looks completely unlike what you expected.

Many photographers are quite happy to leave their cameras on the auto white balance option, allowing the camera to decide which will look best, but this is not always ideal when shooting in nature. One movement of the camera angle, and the white balance will shift to a new option, completely changing the look of the image, which can be problematic when you are trying to create a series of images.

White balance doesn’t always have to be about getting the colours right as there can be a creative element to your approach with setting the balance.

The Fast way to Figuring out White Balance for Nature Photography

When out in nature, you have just about no control over how the landscape looks. To make sure that the colours are complementary and work well together, these are the steps to follow:

Step 1: Look at the colours and how the light affects them. The angle at which you take your snap can affect your white balance and how your camera perceives the colour.

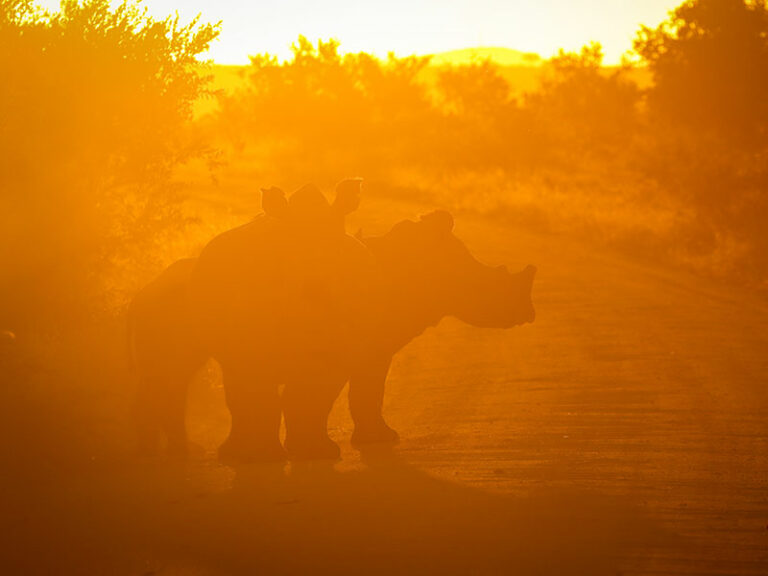
Step 2: Think of the mood. If it is late in the day, using a white balance that brings out those golden colours might be best. And if you are shooting in the early morning, making the most of that brighter blue light could be what works for you.

Step 3: Consider the focal subject. How the light and the surrounding colours work with the subject is incredibly important as the wrong approach to your white balance could have your subject disappearing into the landscape.

When shooting in the African wild for the first time, going on a photographic safari will help you get your settings right, and it will give you the opportunity to ask a professional wildlife photographer for assistance.

We offer unique African photographic safaris, which are not only fun but also informative. Contact us today to make your booking.


Ready to Experience the Wild?

Join Wild Photo Africa on an unforgettable photographic safari in the Kruger National Park.

The Best Gear to have for an African Safari

Kruger Safarisare the perfect excuse to get out there and flex your skills. And you don’t have to be a professional to take some fantastic images while in the Park.

Kruger Park photo safaris, and Africa photo safaris in general, offer a unique approach to the safari experience and they focus predominantly on providing those on tour with an unforgettable journey primarily focused on taking fantastic photos.

In this month’s blog, we are discussing gear. It is a hot topic, because there are some who believe the best gear you have is what you have on you, while others will encourage photographers to invest in more expensive new gear to up their game.

But before we get into the topic, understand that we know not everyone has the money to splurge on equipment they might only use once.

And if you are an amateur, don’t feel pressured to buy gear. Instead, if you want the benefits of the equipment we mention, without paying out the money, we suggest renting the equipment you will need. There are a few places close to the Kruger National Park where you can rent equipment, and a quick Google search will lead you in the right direction.

Africa Photo Safaris

The Equipment

  • Invest in an SLR Digital Camera

There are all types of cameras on today’s market. Mirrorless, Point and Shoot, and DSLR are about the most popular at the moment, and each differs in terms of price and capability. Point and Shoot is generally compact and light, and will have its lens attached to it. The Mirrorless and DSLR cameras can also be compact but they  allow the photographer to attach various lenses.

So which is best?

Hands down, the DSLR. The image quality, even from a distance is quite outstanding, and its capabilities, including manual functions which will give you full control over the shutter, the aperture and the ISO.

DSLR cameras are also quite affordable these days, so if you are a keen photographer, this is well worth the investment.

  • Invest in the right lens

If you go for the Point and Shoot you will not need a lens, simply because your camera will not be able to accommodate one. So buying the right camera is important if you want to make use of the best lenses.

A super-telephoto lens, preferably with a 300mm focal length are ideal for safaris as they allow you to take full photos from quite the distance away. You should also consider shorter lenses, as well as having a macro lens. There will be times when what you want to photograph is a lot closer than your telephoto lens will accommodate, in this case, a more appropriate lens will be the best option.

  • Other extras

Tripods are a must, although depending on the type you choose, you are unlikely to use a massive tripod while in the vehicle. Tripods are ideal for removing shake from your photos and they are a must for those evening star photos. You can also bring along a beanbag which you can use to lean your lens on for support. This is especially helpful if the lens is rather heavy.

Wild Photo Africa offers a unique photographic experience for all kinds of photographers. Taking our guests deep into the heart of the Kruger National Park, our guests can look forward to a truly rewarding experience.

Make your booking today.


Ready to Experience the Wild?

Join Wild Photo Africa on an unforgettable photographic safari in the Kruger National Park.
Kruger National Park Photo Safari Guide

The Dos, the Don’ts and the Tips you need to know

Every photographer, whether they have turned their hobby into a profession or are simply enjoying the immense fun and creativity that is associated with picking up a camera and snapping away at all sorts of things, can benefit from having a guide when they embark on their first photo safari.

The ever changing Kruger National Park is the kind of place that every photographer dreams of visiting. Even if you are not a massive wildlife photography fan, you can agree that the animals, plants, birds and trees all make for exquisite images.

Photos from the Park feature in coffee books, magazines and prints all over the world, and are treasured for their beauty and for the fact that they are quite the conversation starter. The sheer abundance of the number of animals in the Park, and the diversity of the species, makes even a single day in the Kruger well worth the visit. 

One benefit of signing up for a photo safari is that the wildlife that roam the Park are quite used to passing vehicles so they are not likely to flee when a safari vehicle gets too close.

Wildlife Photo Safaris

Photo Safari Tips from the Pros

Clear Days: On these days, you’ll want to get out there in the 2 hours after the sun has risen and in the 2 hours before the sun sets. These are your “golden hours” when you will have the best possible natural lighting. Early morning lighting provides a certain clear brightness that you won’t get at any other time of the day.

Afternoon sunlight has a deeper glow to it, and this makes it the perfect light for setting the mood.

Overcast days: Although they are quite rare, these are perfect days for shooting as the light is ideal for just about the whole day. On these days you can also bring in your flash and use it to really bring the subject into focus.

Turn off your vehicle: If you are a part of a guided safari group, your guide will know how important it is to turn off the engine. The vibration of a running engine can cause your images to blur, so if you are travelling on your own, remember to cut the engine.

Animal close ups: Obviously you can’t leave your vehicle and just walk up to the animals. Instead you should either have a quality lens that allows you to zoom without lowering the quality of the image or you need to just be patient and hope the animal comes closer to you.

The Do’s and the Do Not’s

Some of these are simply Park rules while others are good practices to keep in mind:

  • Always respect the animals and the surrounding nature you find yourself in
  • Show respect to your fellow visitors
  • Have a chat with other visitors and find out what they have seen and where
  • Stay in the vehicle at all times unless you are in a place where you are allowed to get out

Ready to Experience the Wild?

Join Wild Photo Africa on an unforgettable photographic safari in the Kruger National Park.