Photography is all about the light. You get good light, usually the early morning or late afternoon, and then you get the light that is not so great for shooting, which is usually your very harsh midday light.
The thing about lighting when it comes to nature photography is that you don’t always get to choose when that perfect shot will come along because nature is just so unpredictable. To get a perfectly balanced shot, you need to understand light and how it interacts with your camera.
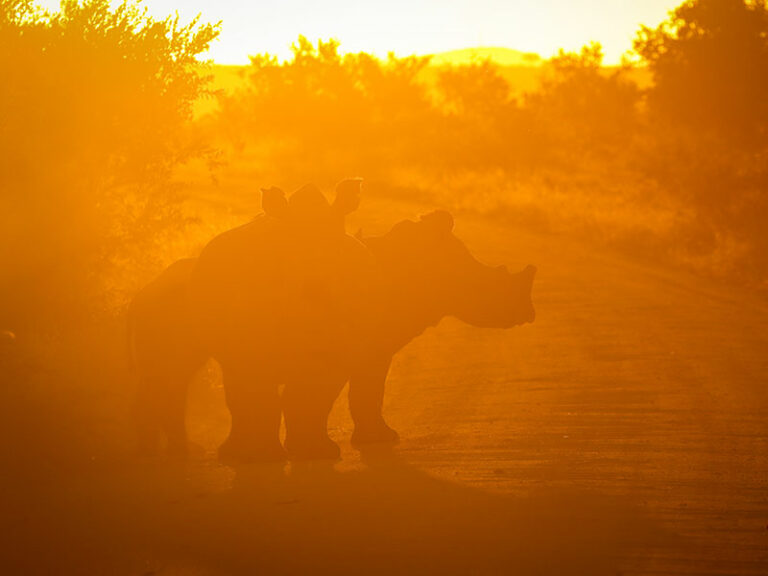
When we talk about white balance, we are not just talking about the quality of the light you have available to you, but also the colour of the light. The amount of light and the colour of the light is guaranteed to have an effect on the final outcome of your photo because it will affect the overall mood that you end up creating with your images.
If you are not all that experienced with your photography, you might snap a shot and then when you upload it to your computer, you might wonder why the colour doesn’t look right. The image could look too orange or too blue, and this is something that is not necessarily easily edited without changing other elements of the image.
For this reason, you need to learn about white balance, and how you can work with white balance to get the right look.
What is white balance?
All cameras have a built in white balance function, even the cheapest of point and shoot cameras have them. With the white balance function, you are able to choose the right option for the scene and the lighting you are working with, and the camera will even out the hues, ensuring that you don’t end up with an image that looks completely unlike what you expected.
Many photographers are quite happy to leave their cameras on the auto white balance option, allowing the camera to decide which will look best, but this is not always ideal when shooting in nature. One movement of the camera angle, and the white balance will shift to a new option, completely changing the look of the image, which can be problematic when you are trying to create a series of images.
White balance doesn’t always have to be about getting the colours right as there can be a creative element to your approach with setting the balance.
The Fast way to Figuring out White Balance for Nature Photography
When out in nature, you have just about no control over how the landscape looks. To make sure that the colours are complementary and work well together, these are the steps to follow:
Step 1: Look at the colours and how the light affects them. The angle at which you take your snap can affect your white balance and how your camera perceives the colour.
Step 2: Think of the mood. If it is late in the day, using a white balance that brings out those golden colours might be best. And if you are shooting in the early morning, making the most of that brighter blue light could be what works for you.
Step 3: Consider the focal subject. How the light and the surrounding colours work with the subject is incredibly important as the wrong approach to your white balance could have your subject disappearing into the landscape.
When shooting in the African wild for the first time, going on a photographic safari will help you get your settings right, and it will give you the opportunity to ask a professional wildlife photographer for assistance.
We offer unique African photographic safaris, which are not only fun but also informative. Contact us today to make your booking.
Ready to Experience the Wild?
Join Wild Photo Africa on an unforgettable photographic safari in the Kruger National Park.


