How Springtime Weather Affects Wildlife Photography

South Africa’s Kruger National Park is a wildlife photographer’s dream, offering unparalleled opportunities to capture the beauty and majesty of its diverse fauna and flora. 

However, to truly master wildlife photography in Kruger, it’s essential to understand how seasonal variations, particularly the transition into spring, can significantly impact both wildlife behaviour and photography opportunities.

At Wild Photo Africa, we want you to leave an African photo safari with a memory card full of beautiful images, even if you are travelling during spring, a season that is well known for its vibrant bright light and incredible colours. Once you have read through this guide, you will feel better equipped to take on this new season in Africa with your camera in hand.
Wildlife Photo Safaris

The Transition to Spring

As South Africa gradually transitions from the dry winter season to the vibrant and life-renewing spring, the Kruger National Park undergoes a remarkable transformation. The advent of spring brings a burst of colour and rejuvenation, and it’s a particularly exciting time for photographers. Here’s how the change in seasons affects wildlife photography in the Kruger:

Abundant Wildlife Activity

With the arrival of spring, the landscape becomes lush and green as new growth emerges. This abundance of vegetation attracts a myriad of herbivores, from impalas to elephants, who come to graze on the fresh, nutrient-rich plants. The increased activity among these animals provides ample photography opportunities, from close-up shots of grazing herbivores to the interactions between prey and predators.

Migratory Birds Return

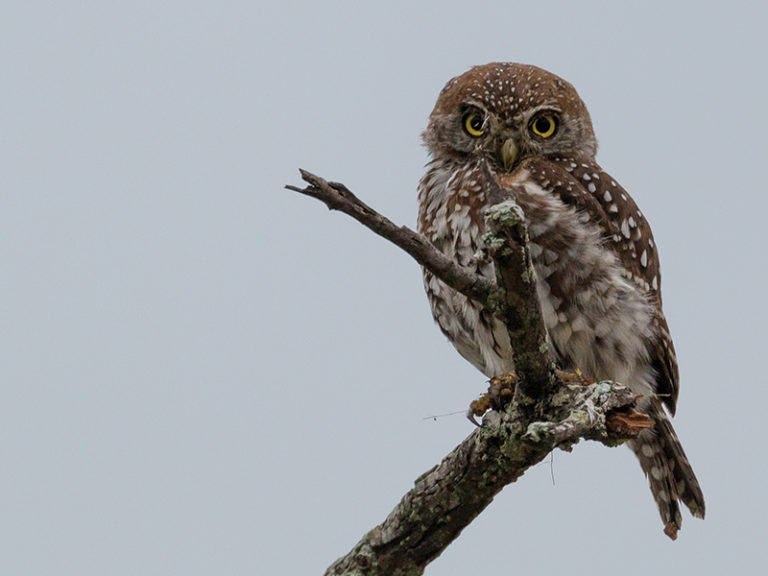
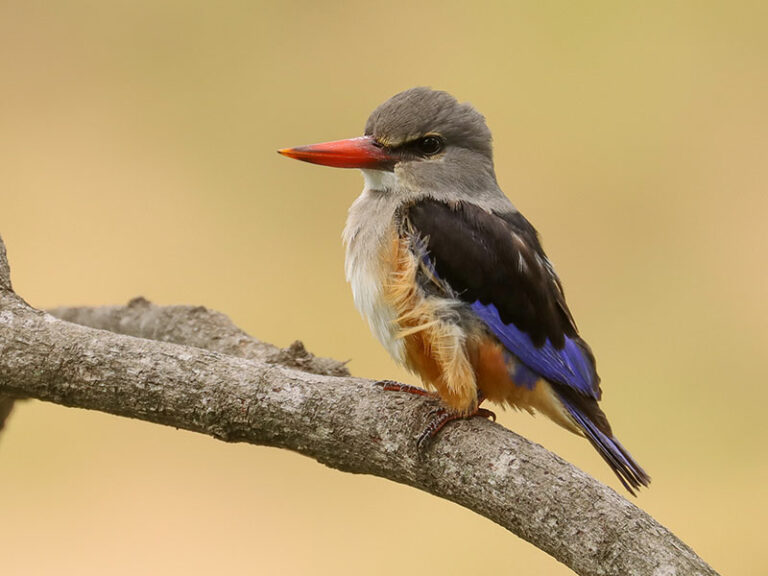
Spring marks the return of numerous migratory bird species to the Kruger National Park. Birdwatchers and wildlife photographers can look forward to capturing stunning shots of colorful and exotic birds, such as bee-eaters, rollers, and various raptors, as they arrive to breed and feed.

Breeding Season

Many species of wildlife in the Kruger time their breeding seasons to coincide with spring’s abundance of food and favorable weather conditions. This presents photographers with unique opportunities to capture tender moments between mothers and their young, whether it’s lion cubs, elephant calves, or baby antelopes.

Dramatic Skies and Light

Spring often brings a mix of weather conditions, including occasional rain showers and dramatic cloud formations. These weather patterns can lead to stunning landscape shots, with dynamic lighting and the potential for rainbows after the rain. The interplay of light and water can elevate your photography to a whole new level.

Less Dust and Haze

Compared to the dry winter season, spring sees a reduction in dust and haze in the atmosphere. This results in clearer, crisper images, making it easier to capture sharp and vibrant wildlife photographs.

Comfortable Temperatures

Spring in the Kruger offers milder temperatures compared to the scorching heat of summer. This comfortable climate allows photographers to spend more time in the field without battling extreme conditions.

Predator-Prey Dynamics

Spring’s abundance of prey animals often leads to increased predator activity. This can offer dramatic wildlife photography opportunities, such as lions stalking their prey or leopards lounging in trees after a successful hunt.

Blooming Flora

Springtime in Kruger is not only about the animals but also the beautiful flora. The park bursts into bloom, with colorful wildflowers carpeting the landscape. These natural backdrops can add vibrancy and depth to your wildlife photographs.


Ready to Experience the Wild?

Join Wild Photo Africa on an unforgettable photographic safari in the Kruger National Park.
Telephoto Techniques for Kruger’s Wildlife

As a wildlife enthusiast going on their very first journey into the wilds of the Kruger National Park, capturing up-close shots of animals in their natural habitat is a dream come true. 

Telephoto lenses, the workhorses of wildlife photography, play the most important role in achieving those stunning close-ups without intruding on the animals’ space because without a lens of this kind, you are unlikely to be able to capture that sort of intimate shot. 

At Wild Africa Photos, we can teach you all about the art of using telephoto lenses effectively in Kruger, by sharing valuable techniques that will help you get closer to the wildlife while maintaining respect for their natural environment (and your safety)

To get you started on your learning journey, here are some helpful tips and tricks that you need to know. 

The Power of Telephoto Lenses

Telephoto lenses are instrumental in bringing distant subjects closer, which is essentially what will allow you to capture the nuances of wildlife behaviour without causing undue disturbance. 

In Kruger National Park, where animals roam freely, these lenses offer a unique opportunity to witness their natural interactions and behaviours from a safe distance.

Choosing the Right Telephoto Lens

Selecting the appropriate telephoto lens for your wildlife photography needs is an obvious essential. 

A lens with a focal length ranging from 200mm to 600mm is ideal for capturing the diverse range of animals in Kruger. When making your selection, you need to consider factors like weight, image stabilisation, and the maximum aperture. 

Telephoto lenses are notoriously heavy and if they don’t have built in image stabilisation the image won’t be sharp. 

Stabilising Your Shots

To avoid camera shake and to achieve sharp images, you should use a sturdy tripod or a monopod in conjunction with your telephoto lens. Image stabilisation in the lens itself can be advantageous, especially when photographing wildlife in low-light conditions or during extended handheld sessions. 

You can also lean your lens on the window frame of the safari vehicle, but don’t do that when the vehicle is moving. 

Composing the Shot

Framing is important when using a telephoto lens in Kruger. 

When framing, focus on the animal’s eyes and position your subject within the natural surroundings, this way you will be able to tell a compelling story. Pay attention to the rule of thirds and consider making the most of your negative space to create a balanced and aesthetically pleasing composition.

Mastering Autofocus

Telephoto lenses often have complex, but incredibly helpful autofocus systems, and understanding and customising your camera’s autofocus settings is essential if you want to take a crisp photo. 

As you get to grips with your new telephoto lens, make time to experiment with different focus modes, such as continuous autofocus (AF-C), to track moving subjects effectively.

Patience is Key

Wildlife photography requires the utmost patience. 

Animals in Kruger may be elusive or engrossed in their activities, and as such they can be hard to find. By being patient, you can wait for the right moment to capture their unique behaviours and interactions. Being patient also ensures you won’t miss out on those extraordinary shots.

Camouflage and Concealment

To get even closer to wildlife without alarming them, you should consider using natural camouflage or concealing yourself in a hide. By blending into the surroundings, you become part of the environment, and the wildlife will be able to carry on with their natural behaviours undisturbed.

Shooting at Eye Level

Photographing animals at eye level establishes an intimate connection between the viewer and the subject. You can achieve this angle by lowering your shooting position, which will create a more immersive and powerful image that conveys the animal’s perspective.

Mindful Distances

Respect for the animals’ comfort zones is vital. Avoid getting too close or disturbing their natural routines, you can do this by utilising your telephoto lens to close the distance while maintaining a safe and respectful space.

Post-Processing Magic

Once you’ve captured your telephoto shots, post-processing can enhance the impact of your images. Lightroom or Photoshop can help fine-tune the details, colours, and sharpness to bring out the full potential of your wildlife photographs.


Ready to Experience the Wild?

Join Wild Photo Africa on an unforgettable photographic safari in the Kruger National Park.

Telling Stories through your Wildlife Photography

Going on a captivating journey through the vast landscapes and diverse ecosystems of South Africa on a photo safari is an opportunity not only to witness the mesmerising wildlife but also to tell fascinating and intriguing stories through your photographs. 

African wildlife photography is about more than capturing beautiful images; it is about capturing moments that weave a narrative and evoke emotions. 

With a couple of tips and some helpful information, you can become a wildlife storyteller yourself. Here’s what you need to know to get started. 

Understanding the Essence of the Narrative

Narrative in wildlife photography is the art of conveying a story or a moment through a single image or through a series of photographs.

It goes beyond a simple, quick snapshot of an animal as it encapsulates the behaviour, interactions, and essence of the subject within its habitat. The narrative weaves a connection between the viewer and the wildlife, evoking emotions and fostering a deeper appreciation for the natural world.

Researching and Preparing the Story

Before setting off on your South African photo safari, take the time to research and understand the animals and their behaviours. This knowledge will help you anticipate and capture moments that reflect the story you wish to tell. 

You should learn more about the unique characteristics of the wildlife you are likely to encounter, their social dynamics, and the significance of their presence within the ecosystem.

Patience and Observation

The key to unravelling the story lies in patience and keen observation. Spending time observing the behaviour and interactions of the wildlife you encounter and paying attention to subtle gestures, expressions, and the relationships between individuals can help you create powerful storytelling images.

Composition and Context

Compose your images thoughtfully will help to convey the narrative effectively. 

You should consider the surroundings and the habitat in which the wildlife lives, and be sure to include elements that provide context and give a sense of place, such as the sweeping savannah, the towering baobab trees, or the dramatic African skies. The interaction between the subject and its environment enhances the narrative and transports the viewer into the heart of the story.

Timing and Emotion

Timing in wildlife photography can create emotions and show off the drama of a moment. When capturing your images, look for the expressions and actions that reflect the essence of the story you want to tell. 

A lion’s mighty roar, a tender moment between a mother and her cub, or the intensity of a predator’s pursuit all hold immense storytelling potential. 

Sequencing and Storytelling Series

While a single image can be powerful, a series of photographs can create a comprehensive narrative. By capturing a sequence of moments that build upon each other,you will be able to tell a complete story from beginning to end.

This could include the progression of a hunt, the birth of new life, or the unfolding of social dynamics within a herd. Through careful sequencing and storytelling, you can immerse your viewers in the enchanting world of South African wildlife.

Post-Processing and Enhancing the Narrative

Post-processing is the final touch in bringing out the full potential of your storytelling images. 

You can effectively use editing tools to enhance the mood, emphasise key elements, and fine-tune the visual impact of your photographs. Be mindful, however, to maintain the authenticity and integrity of the scene you captured, ensuring that the story remains genuine and evocative.

Ready to start telling stories? Book your African photo safari with us today. 


Ready to Experience the Wild?

Join Wild Photo Africa on an unforgettable photographic safari in the Kruger National Park.

Enhancing Your Wildlife Photos in Lightroom or Photoshop

Capturing stunning wildlife photographs is an art form that goes well beyond the click of your shutter. 

In this digital age, post-processing plays a crucial role in bringing out the full potential of your wildlife images. By leveraging the power of software such as Adobe Lightroom or Photoshop, you can enhance the beauty, clarity, and impact of your wildlife photos. You just need to know how to use the software, in a soft way, to get the image that you want. 

At Wild Africa Photo we escort amateur and professional photographers on safaris through the Kruger National Park, and in this, our latest blog, we are going to have a chat about some post-processing secrets that will take your wildlife photography to the next level.

Organising and Importing Your Images

Before diving into the realm of post-processing, it is essential to establish an organised workflow. After you have removed your images from your SD card, you should create a logical folder structure and then import your images into a catalogue in Lightroom. This will ensure easy access and efficient management of your wildlife photo library. Before you do this, filter through the RAW images and throw away any that is blurry or too under or over exposed. Only import images you know you want to edit. 

Mastering RAW Processing

Shooting in RAW format gives you so much more flexibility when it comes to post-processing. 

You need RAW images to fully adjust exposure, recover highlights, boost shadows, and fine-tune white balance, as these details can sometimes be impossible to recover in JPEG images. Remember, RAW processing is the foundation for achieving accurate and vibrant wildlife images. 

Enhancing Details and Sharpness

Wildlife photos often benefit from a boost in clarity and sharpness to bring out fine details. These tools are available in Lightroom or Photoshop and they are ideal for enhancing the textures and feather details of birds, fur patterns of mammals, or intricate scales of reptiles. 

A word of caution though, before you jump in. Clarity and sharpness can be overused and the result can make an image look unnatural. Don’t go more than 50% when using these tools. 

Fine-Tuning Colours and Contrast

To make your wildlife images visually captivating, refining the colours and contrast is important.

Lightroom’s HSL/Colour panel allows for selective adjustments of individual hues, saturation, and luminance. 

You can tweak these parameters to enhance the vibrancy of bird plumage, bring out the richness of animal fur, or accentuate the vividness of a natural habitat. 

Use the tone curve adjustments in Lightroom or curves adjustment layers in Photoshop to fine-tune contrast for more impactful results.

These tools are also ideal to use if you want to scale back colours. Sometimes greens can come out a little too vibrant depending on your camera settings, so if you are shooting in a dry location, you’ll find having a colour tool useful for evening things out.

Removing Distractions and Enhancing Composition

Wildlife photography often presents challenges such as unwanted distractions or elements that may detract from the subject, like branches or leaves half covering the subject or just looking strange. 

In these instances, you can use Lightroom’s spot removal tool or Photoshop’s healing brush to eliminate distracting objects or blemishes without compromising the integrity of the image. Additionally, cropping or straightening the composition can help refine the focus on the subject and create a more visually pleasing image.

Finalising with Export Settings

Once you have perfected your wildlife image, it’s time to prepare it for sharing or printing. Pay attention to the export settings to ensure optimal quality, since the image on the screen might look completely different from the print in terms of how light or dark it comes out. 

You should also consider whether it’s for online platforms or high-resolution prints, and adjust the file format, resolution, and sharpening settings accordingly.


Ready to Experience the Wild?

Join Wild Photo Africa on an unforgettable photographic safari in the Kruger National Park.

Photographing Birds in Flight: Techniques for Stunning Avian Images

The graceful motion, the wings spread wide, and the total freedom of a bird in flight make for a mesmerizing photo. While most of these sorts of images are a purely lucky shot and are by no means an easy capture no matter how much experience or talent the photographer has under their belt, there are some things that you can do to improve your chances of taking such a shot when you are out on your African wildlife photography safari

Photographing birds in flight is a little like other types of wildlife photography but with a lot more adrenaline. This style of wildlife photography requires a lot of patience, and a lot of technical know-how because your camera needs to be primed for action. 

In this blog post, we will delve into the world of bird photography, specifically focusing on the techniques and strategies for photographing birds in flight. 

Whether you are a seasoned wildlife photographer or just beginning to explore the world of avian photography, this guide will provide you with valuable insights and practical tips to elevate your bird images to new heights. 

Understand Birds in Flight 

This sounds super complicated but it really is quite easy to get to grips with this tip. Understanding birds in flight will give you a better perspective about their behaviour which in turn will help you to pre-empt its actions. This puts you in a better position to capture the bird as it takes off, as the bird will often show certain signs that it is about to fly away. 

Invest in the Right Equipment 

The right camera and lens is essential to successful bird in flight photography. If this is the sort of hobby that you can really get into, you should buy an appropriate telephoto lens, as most of this sort of photography takes place at quite a distance. You can also think about buying a tripod to support your large lens and camera, as the combination can get heavy. Heavy equipment can cause your arm to shake at the worst moment, resulting in the image being blurry.

Camera settings 

As we mentioned, a heavy telephoto lenses can cause the image to be blurry. But this can be counter balanced if you know how to use your camera settings to your advantage. A fast shutter speed is a must, but with a fast shutter speed comes a darker image, so you need to balance your aperture and your shutter to have an image that is not too dark or too light. You also need to decide if you want to freeze your flying bird or if you want to bring motion into the image, both of which will require you to play with your shutter settings. 

Light Challenges 

Harsh, bright midday sunlight is hard to work with but is sometimes the only light you have. On the other hand, you could be experiencing low light issues, which can be a problem in the early mornings or late afternoons. Both challenges need to be fixed before you line up your shot, because you don’t want to capture that perfect image only to see that it is totally dark or completely blown out. 

Showcasing 

When you have mastered the art and you have a stunning bird in flight image in your hands, you need to showcase it. Share it on your social media, submit it to wildlife magazines and to wildlife social media pages, and if it is a really unique shot, you could even sell it online.


Ready to Experience the Wild?

Join Wild Photo Africa on an unforgettable photographic safari in the Kruger National Park.

Tips for Easily Spotting Wildlife

As a wildlife photographer in the making, you are going to have to hone your wildlife spotting skills as much as you are going to have to learn a couple of nifty new photography tips and tricks.

Photographing animals out in the wild is a completely different experience, when compared to other types of photography. The animals often blends in so seamlessly with the landscape and the vegetation that you really need to know what to look out for when you are looking for that striking subject. And then there is the fact that wildlife tends to move both silently and swiftly, often going completely unnoticed, which means you really have to have your wits about you when you are out on an African photo safari.

At Wild Photo Africa, we are all about helping you to learn more about your wildlife photography passion so that you can get the most out of the overall experience. Part of the process means learning how to see the wildlife in even the most difficult conditions. Spotting wildlife becomes easier over time, when you know more or less what to look for.

To get you started, here’s what you need to keep in mind when on the lookout for a wild subject.

Kruger Park Safaris
  1. Make sure you go out at the right time of day

For the most part, animals will prefer to hide away for most of the day. From around just after the sun has fully risen, to just after the sun begins to set, most animals are hidden beneath trees and shrubs, well away from the intense sunshine and the predators. But the moment the air begins to cool, the scene comes alive with animals and so when looking for wildlife, dawn and dusk are your best times.

  1. Go where the water is

There is a good reason why most dams and rivers have a place where people can stop and spend some time. Water sources are a haven for wildlife, especially in the early morning and late afternoon. And if you want to increase your chances of seeing a hunt, this is the place to go.

  1. Learn about wildlife habits

Different animals have different habits. Some are social and like to be visible in large groups while others like to be more discreet and to hide away. By learning some of the habits of the animals you hope to photograph, you will put yourself in a better position to find and capture them on your camera.

  1. Go on a guided tour

Tour guides who go into the wild are pros at spotting wildlife in the most unusual places. When you go on a tour with a guide, they will be able to teach you more about what it is that you should be on the lookout for and in turn you will benefit by not only learning but also by being able to get that epic shot that you have been hoping for.

Enjoy an amazing, once in a lifetime, African photo safari with Wild Photo Africa. Book your trip today.


Ready to Experience the Wild?

Join Wild Photo Africa on an unforgettable photographic safari in the Kruger National Park.